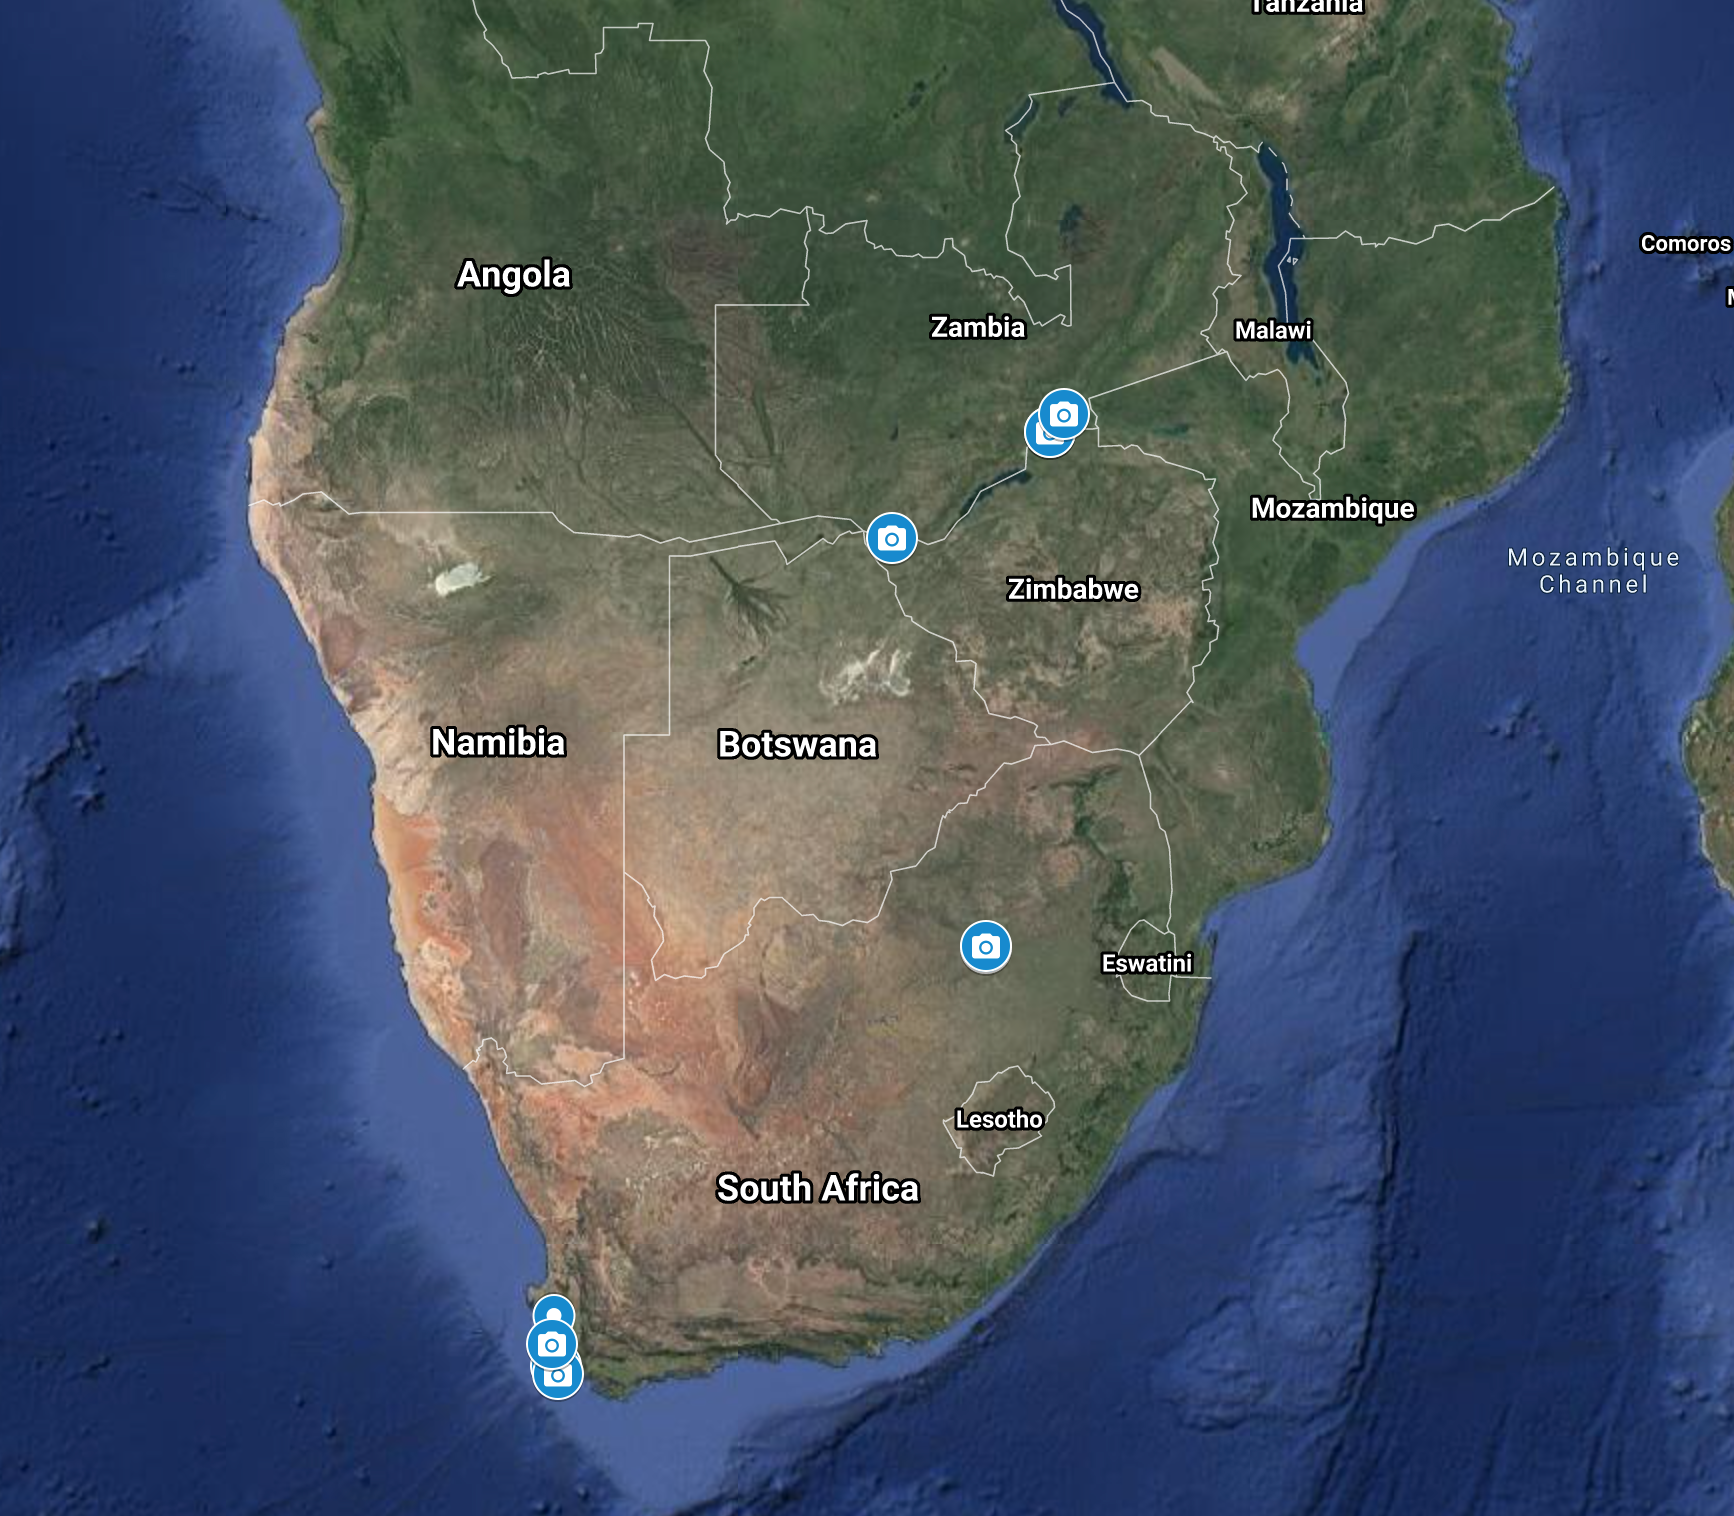
The follow is an embed of Google My Maps showing photos taken at multiple locations while spending a couple of weeks in southern Africa. The map is interactive so you can view a few photos taken at different locations by selecting the camera icons. The best way to use this embedded map is to decrease the size so that you can see multiple camera icons and then explore different locations. There may be locations when viewed from a distance view in which a single camera icon hides the multiple icons at the location. To check this possibility, center the map on a camera icon and then enlarge the map.
Just to explain what I was suggesting from the first paragraph, you will want a map view of about the scale shown below to see all of the photo icons.
Some Comments on My Maps
My Maps is a Google service allowing users to add personal layers to Google maps. Google Map Maker was a popular and easier to use service educators and students used to create personalized maps, but Google discontinued Map Maker. My intent here is to a short tutorial on how I created the Google map you find embedded at the top of this post. Google offers its own help for the product. This tutorial follows a previous post in which I describe the coordinates from iPhone photos. There are multiple ways to position markers on a map. You can search by these coordinates, the name of a location, or simply insert a pin in the map at a location of your choosing. My reason for using the coordinates for photos was explained in the previous post.
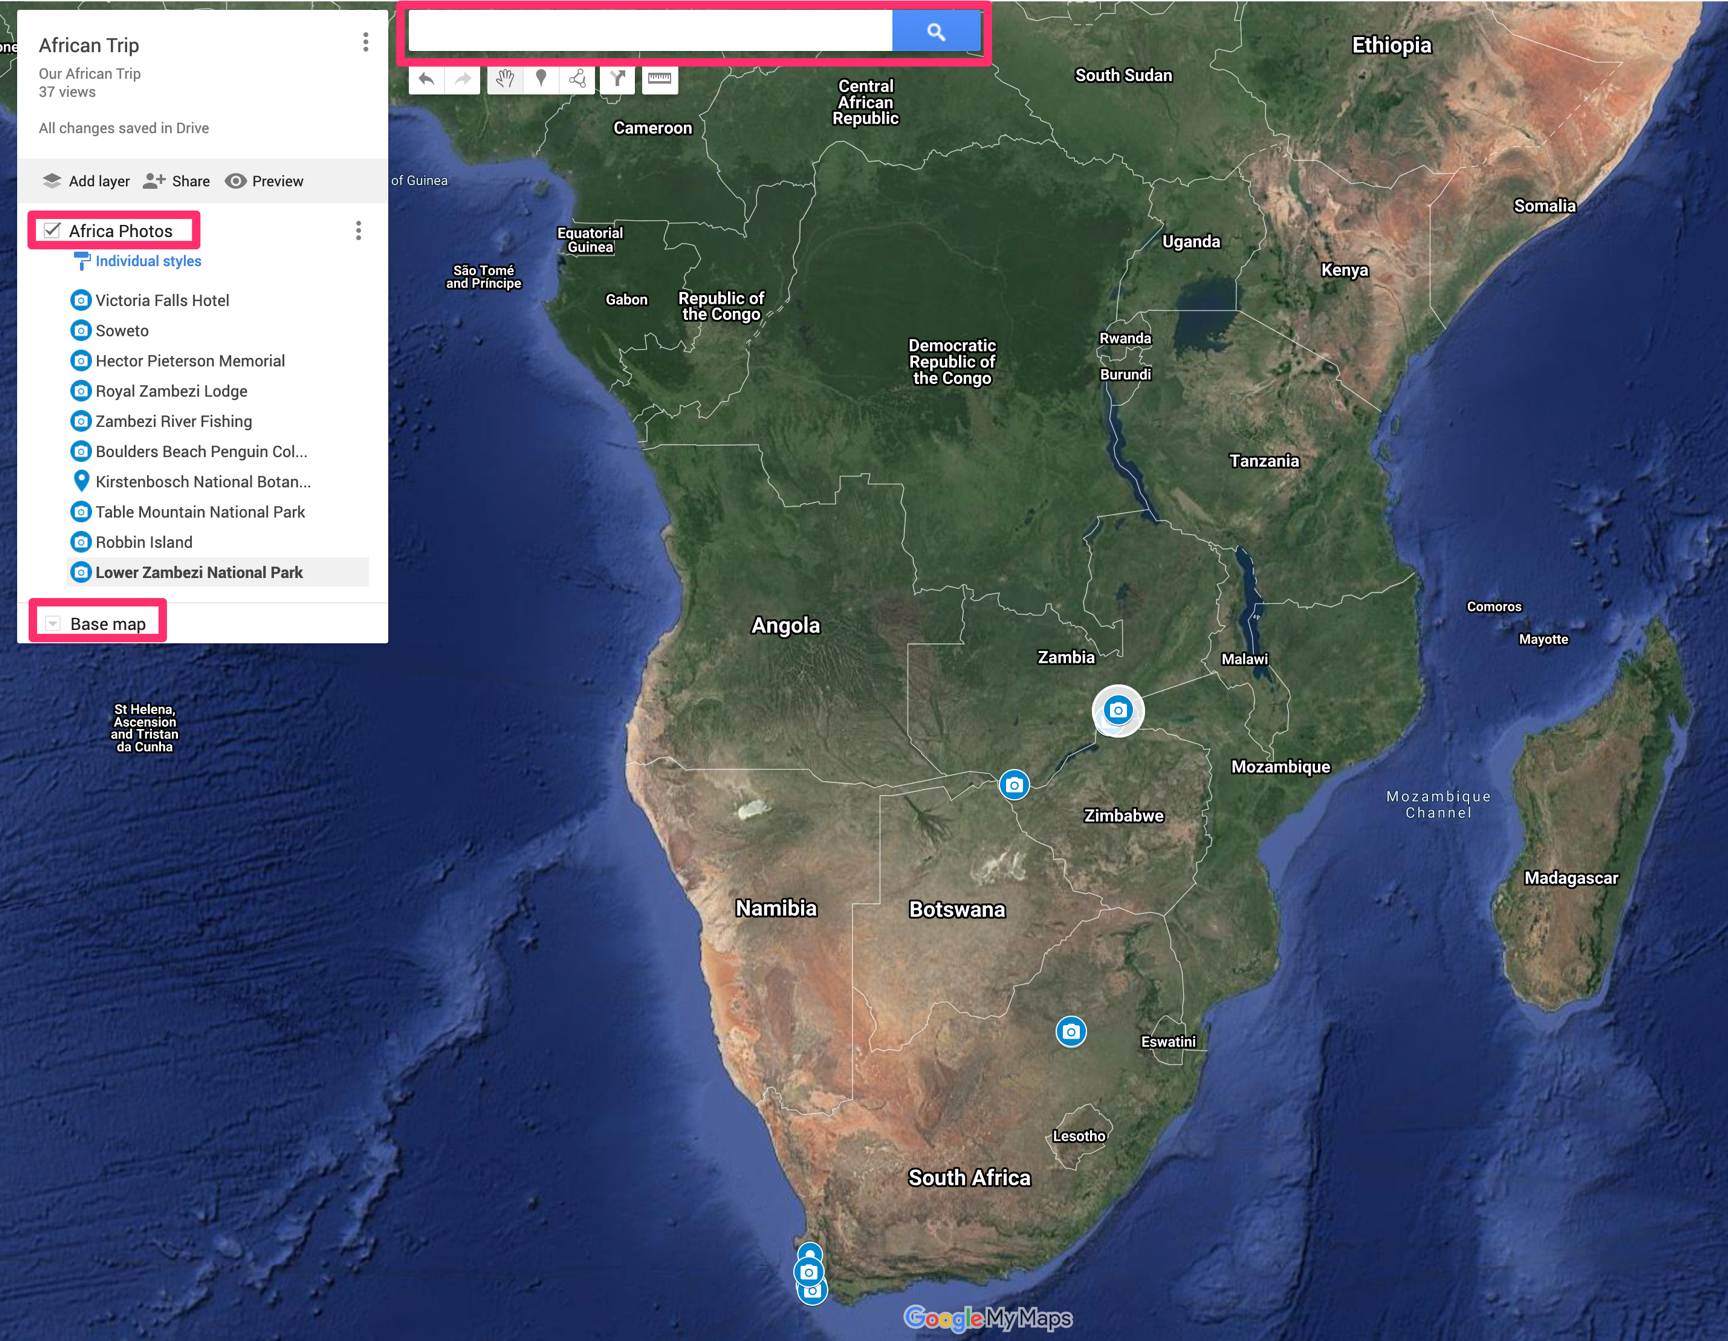
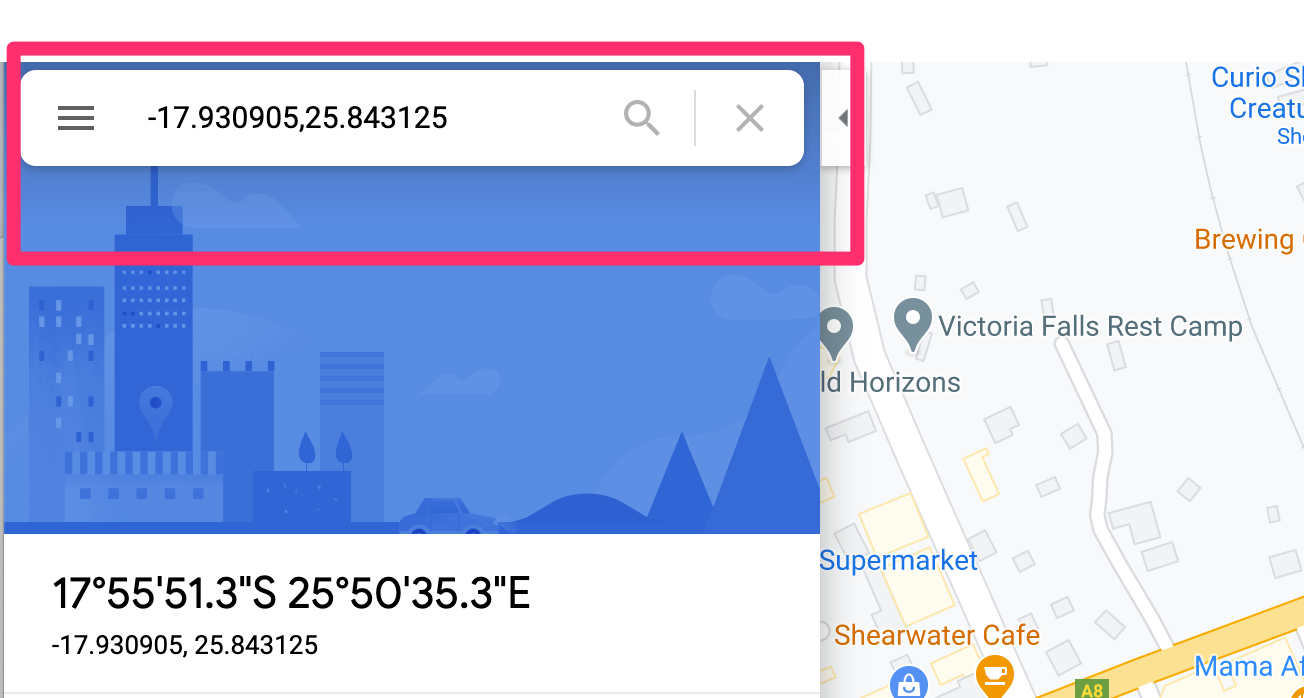
The My Maps interface is shown below. I have highlighted three features in red boxes. The search box is where you would enter map coordinates or formal names for locations to position a pin. The other two boxes indicate the Base Map and the layer I have added (if full size, you should find a button to Add Layer. So you first position My Maps over the region you want and then add a layer that you name (African Photos in this case). The list of locations included in the African Photos includes the locations I have established and named.
So, I want to add a few photos we took during a helicopter flight over Victoria Falls. I have iPhone images and when uploaded to Google Photos (and in other ways), the map location becomes available,
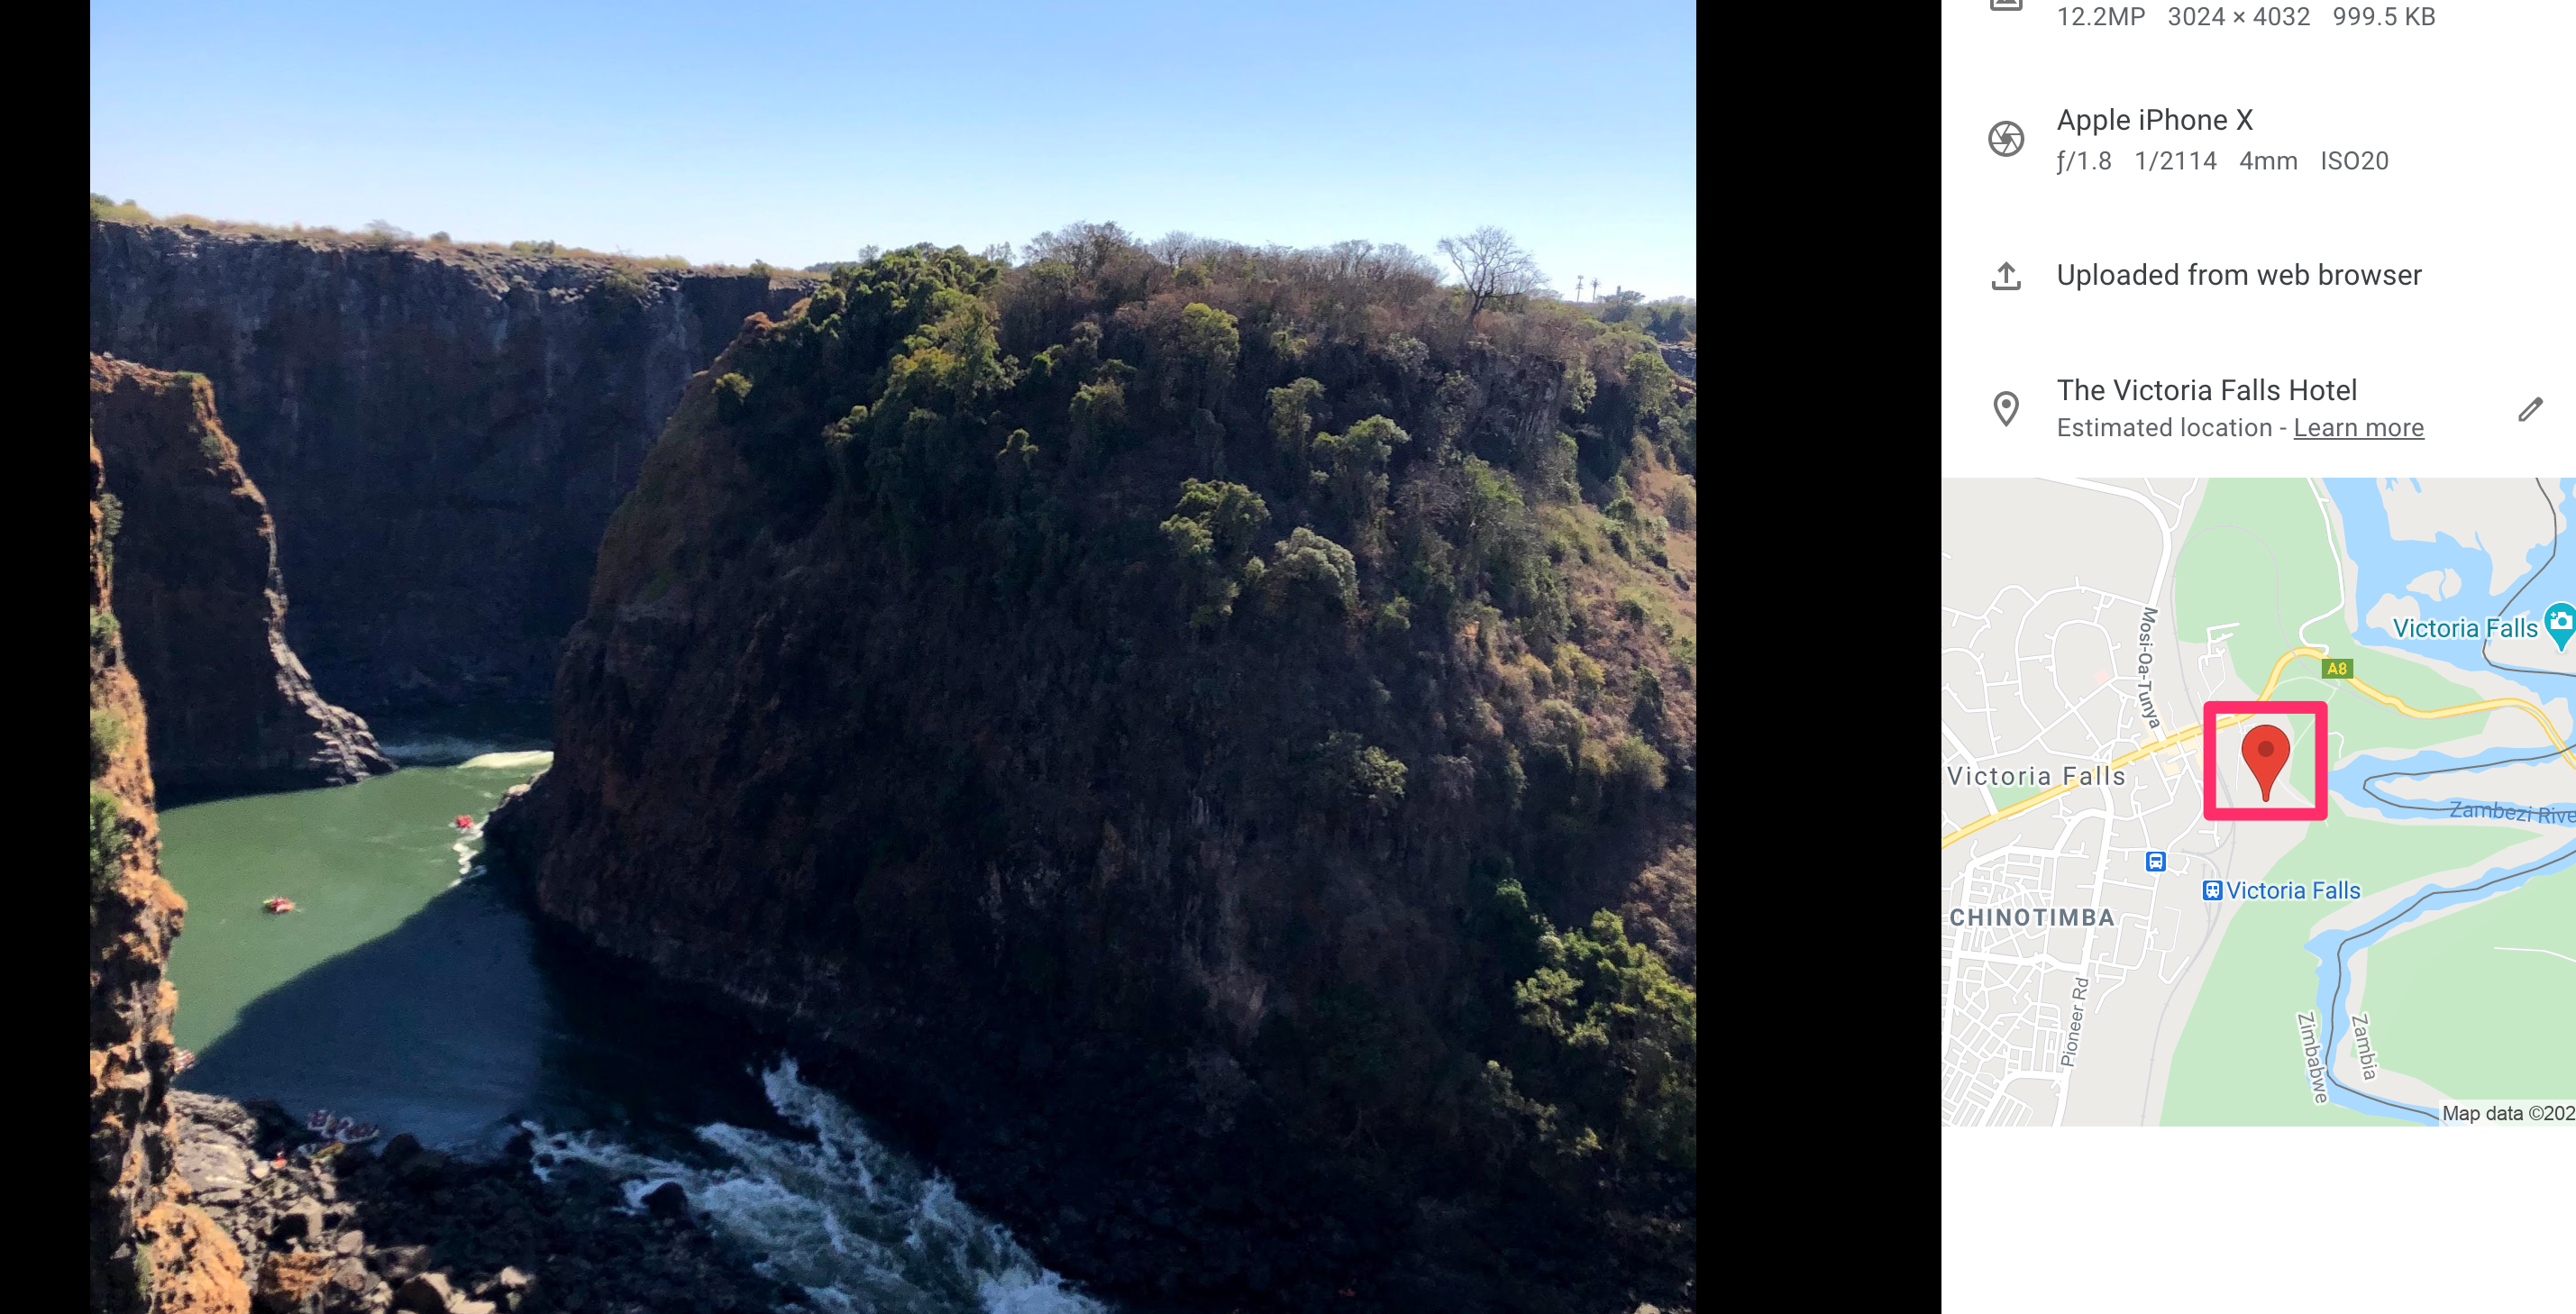
In Googple photos, clicking on the pin showing the location reveals the map coordinates.
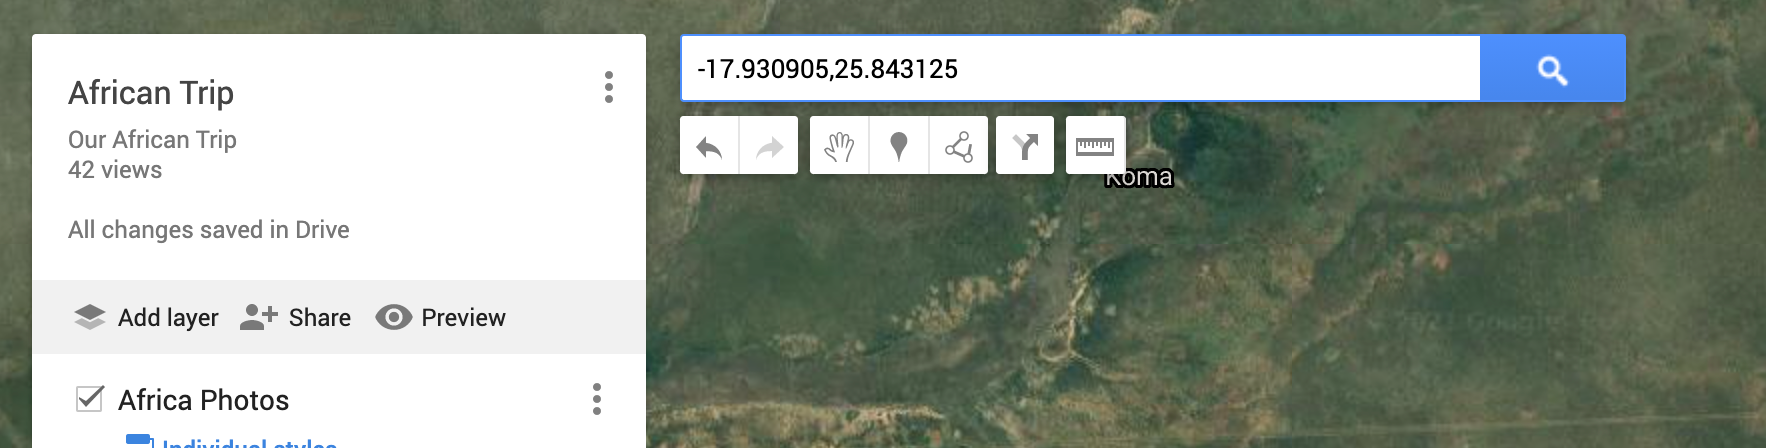
I can copy and paste these coordinates in My Maps to find the location on the map. Of course, I could also just enter Victoria Falls in the search box because I know there is a name for my location. The coordinates are useful when a location is not known or there is no formal name.
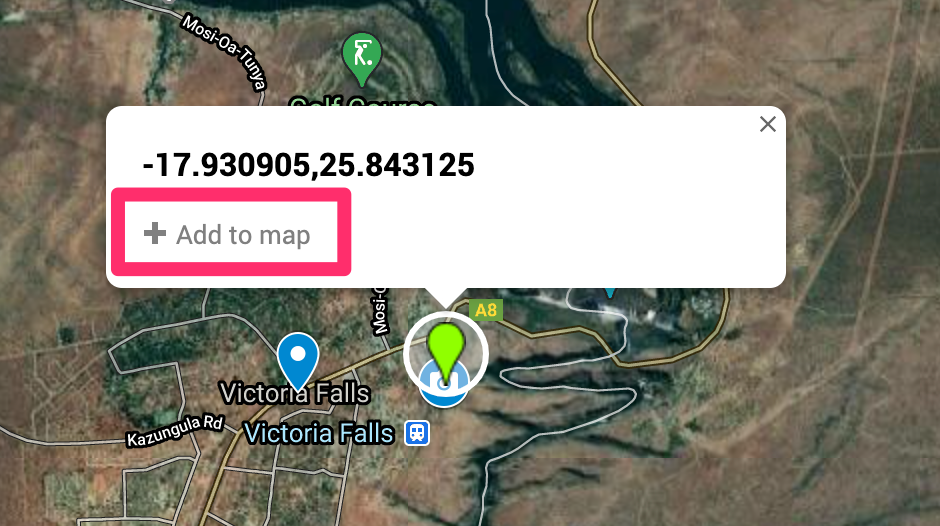
When My Maps searches for the location, it will place a pin and ask if this is the location you want to add to your layer.
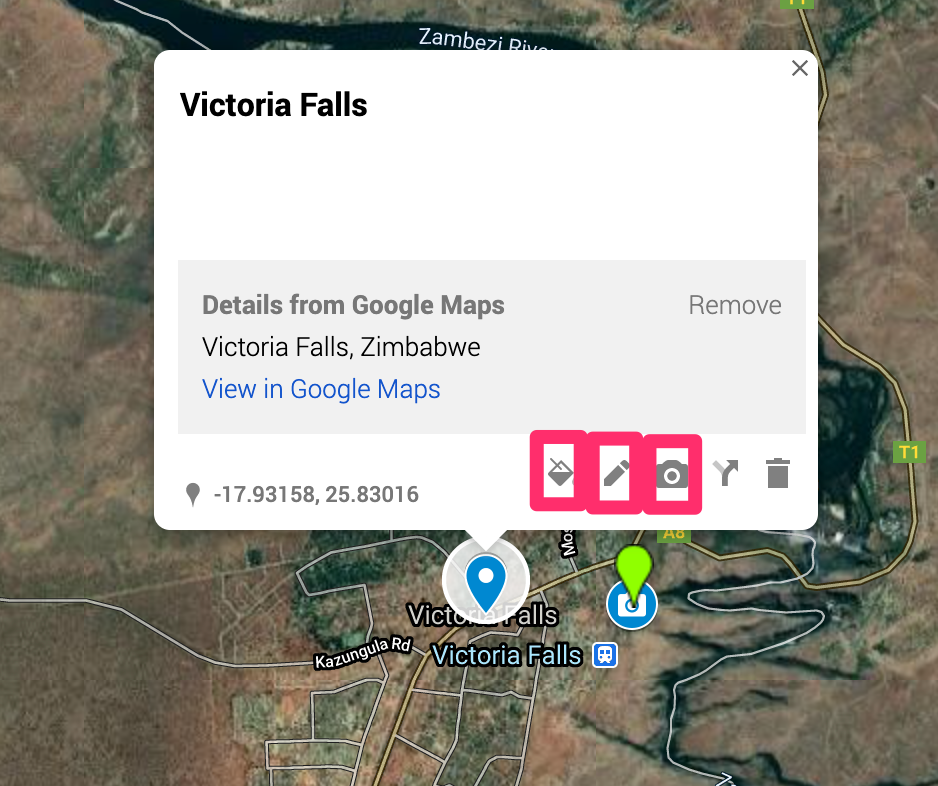
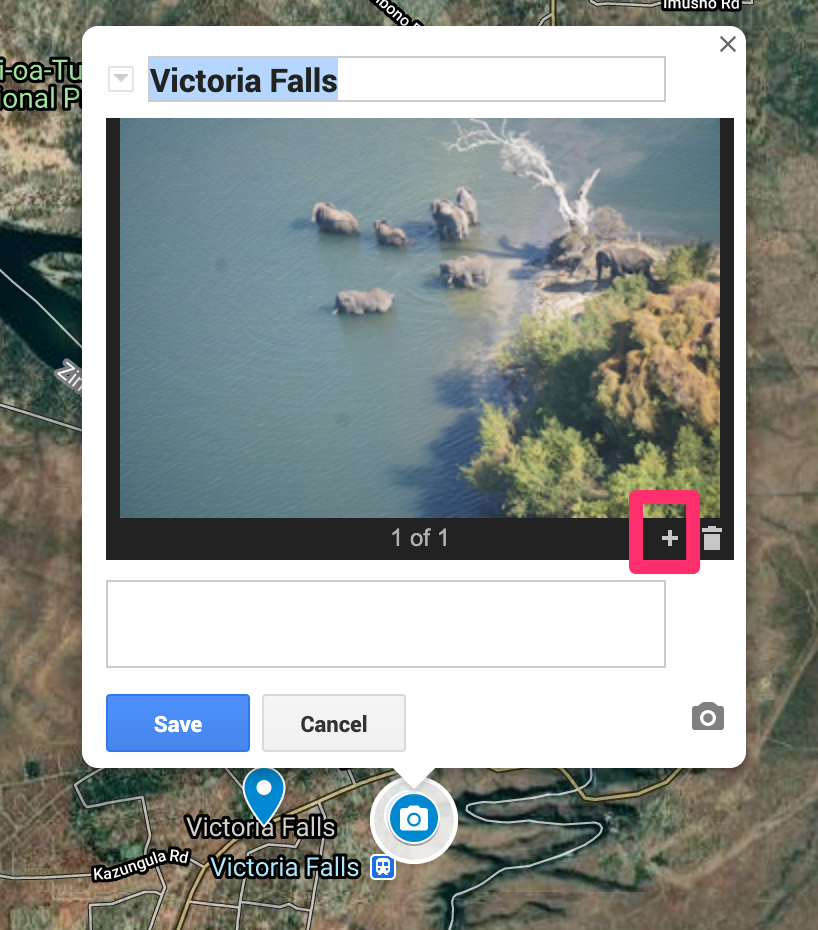
Once the pin in inserted you will see the following display (actually the coordinates will be listed where Victoria Falls now appears). The icons in the red boxes allow changes. The paint bucket allows the substitution of other markers for the general pin. I use a camera icon to indicate photos. The pen icon allows the name for the marker to be modified. In this case, I changed the coordinates to Victoria Falls. The camera icon allows images to be associated with that icon.
Here I have added a photo (a photo I shot from the helicopter with my camera rather than a phone). The + icon allows additional photos to be added.
Once I established a work flow, the processes was tedious, but not that complicated. The images you see in the map as a user are not that large so it makes sense to shrink the size of your photos before uploading. Remember to save.
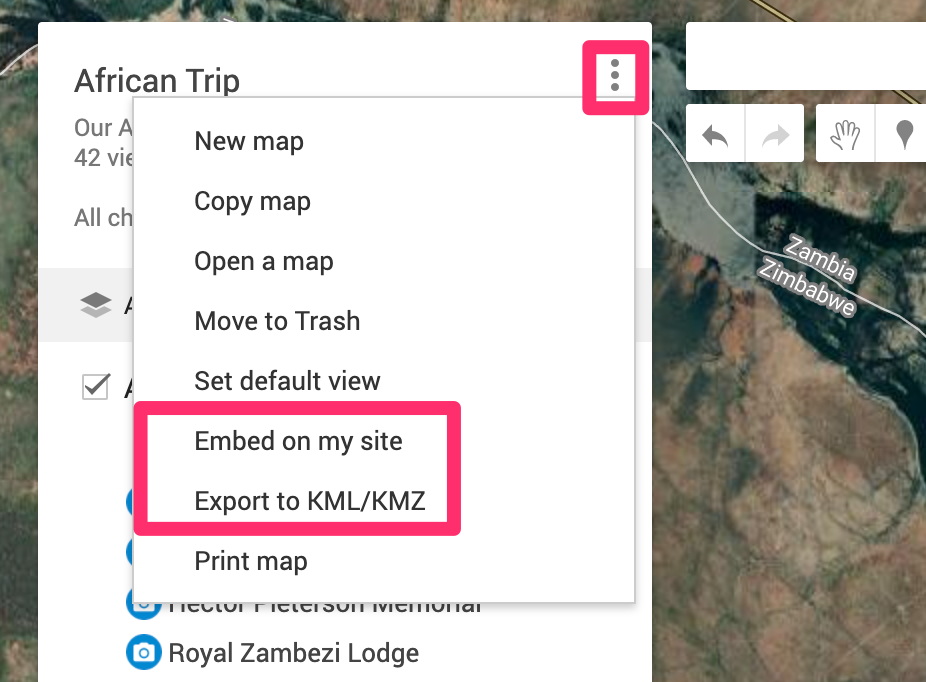
The three dots at the top of the tool window offers options for sharing. I used the embed on my site option for the map at the top of this post. The KML file allows the map to be used in other apps (Google Globe).
This map was intended as a My Maps tutorial. If you are interested in more photos, I have a Flickr folder of animal pictures with links to information at a different URL.
![]()
You must be logged in to post a comment.